
How to set up VPN with Amazon Firestick or Amazon Fire TV
NOTE: For 3rd generation Fire TV, Cube, and Fire TV Sticks. Amazon has changed the permissions on the 3rd generation and above FireTV units, making the setup guide below impossible.
For 3rd generation devices and above, please check out our DIY VPN router options with personalVPN Premier™ here.
- or -
You can check out our preconfigured CloakBox™ VPN router solutions here.
First, load the needed IPSec Certs
To set up your Amazon Fire TV or TV stick, you will need a computer with a USB port.
-
- From your computer right click and choose Save As the IPSec cert.
RIGHT CLICK HERE & CHOOSE SAVE AS
Remember the folder your downloaded the file to on your computer

-
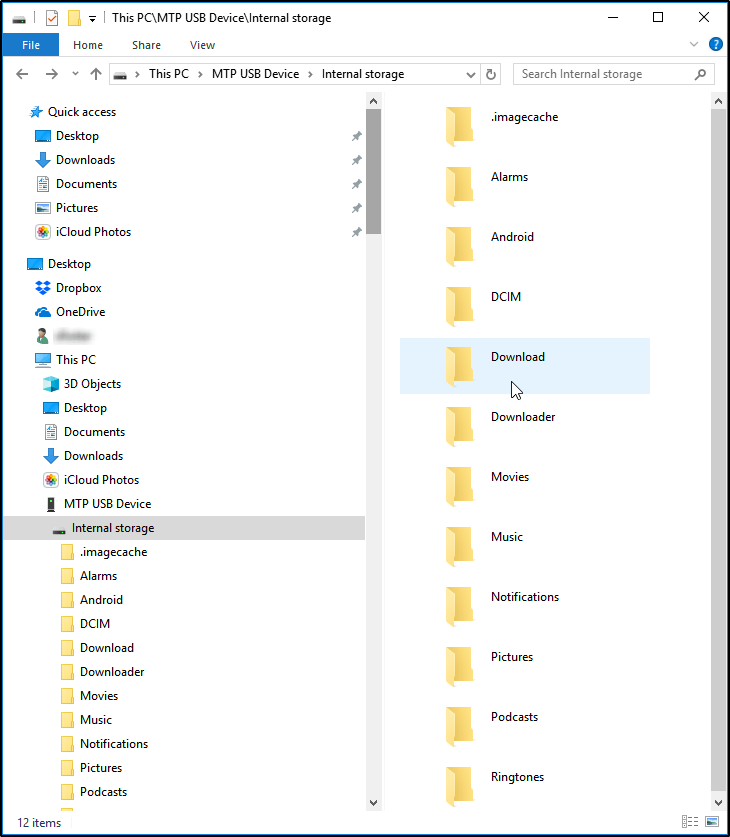
- Connect your FireOS device to your computer via USB (wireless will not work). Drag or copy & paste the IPSec_ca.crt file that you downloaded to your FireOS device. Use the process you normally use to transfer a file to a USB drive.
NOTE: To view and transfer files between Mac and Fire TV/Fire Stick, you will need to download and install the Android File Transfer app here.
Remember the folder your downloaded the file to on your computer
Connect and Set up FireTV Device
-
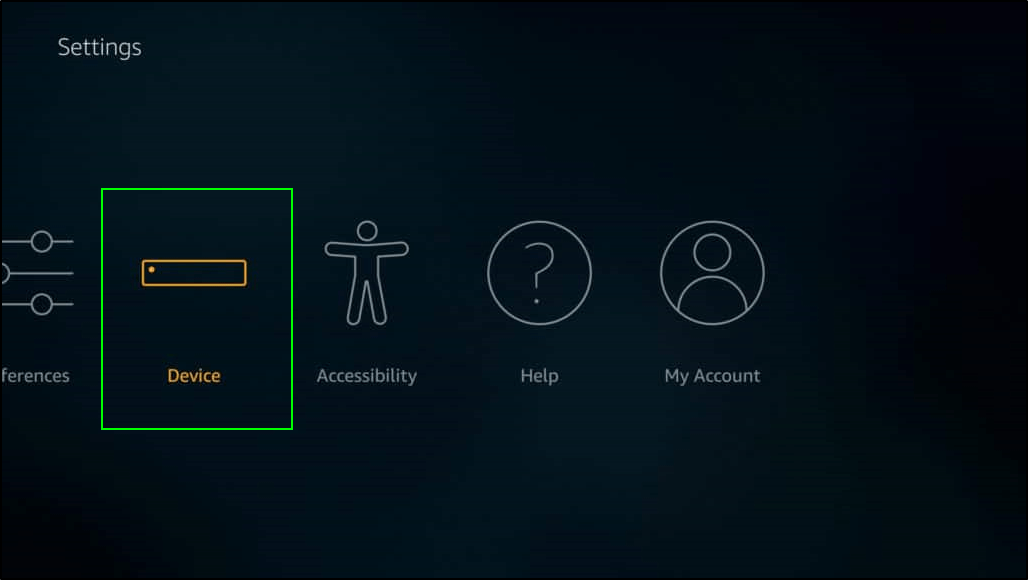
- On your FireTV go to Settings -> Device
-
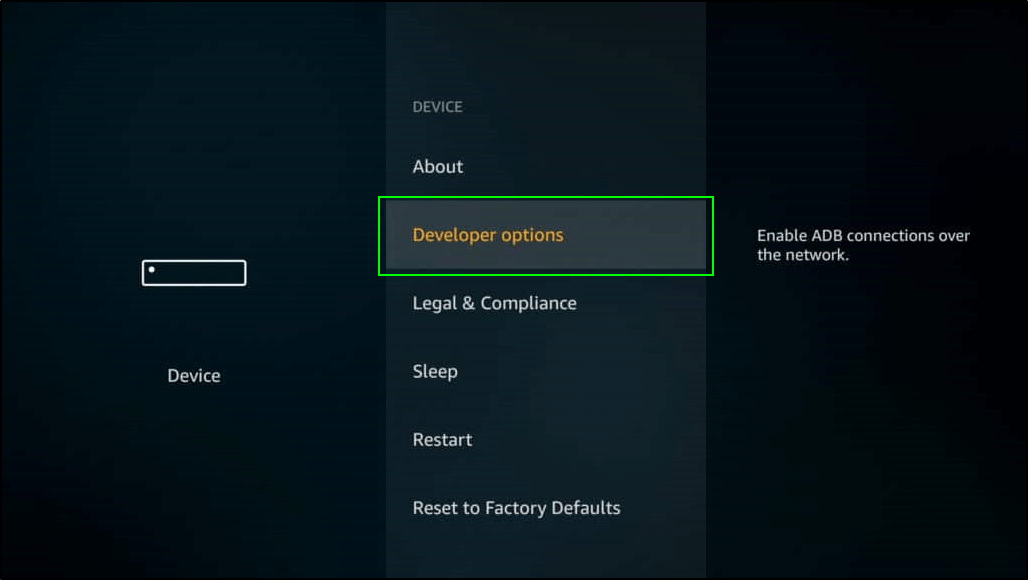
- Select Developer options
-
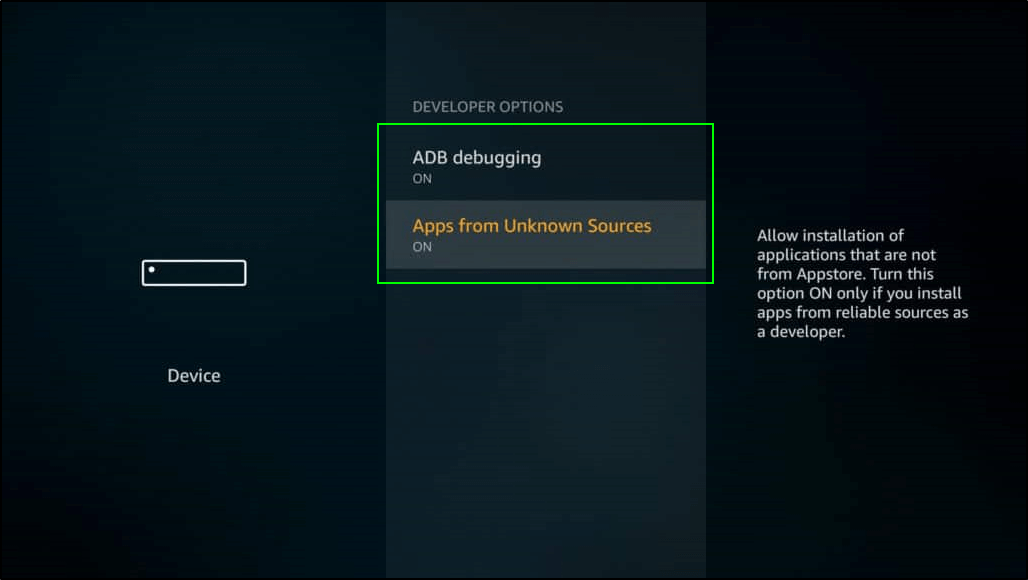
- Switch on ADB Debugging
- Switch on Apps from Unknown Sources
-
- Press the home button on your remote to go back to your home screen. Then enter "Downloader" into your search bar, and search.
- Install the Downloader app. The correct app should show the Developer as: AFTVnews.com
- Once the Downloader app has installed, open the app. In the Downloader search bar, enter exactly this: https://download.strongswan.org/Android/strongSwan-2.0.1.apk
*Tip! The search bar populates "http://" by default, but the correct link starts with "https://"
Please be sure to check this is correct before typing out the whole link/URL. Otherwise, it can be frustrating to have to go back and type it all over again.
-
- When you press Enter, the file should start downloading immediately. If it does not, then use the following link instead: https://download.strongswan.org/Android/
Then, a basic browser window page should open where you can navigate and download the "strongSwan" software. From this page, use your remote to select the .apk file with the most recent date. (NOT the .sig file)
-
- Once the download is complete, you should automatically be prompted to install the APK file.
(If you are not automatically prompted, go to "Files" from the Downloader app. Then select and launch the strongSwan APK file you just downloaded.)
The strongSwan app should then open automatically. You can also open the app by going to Settings > Applications > Manage Installed Applications > strongSwan > Launch Applications
-
-
-
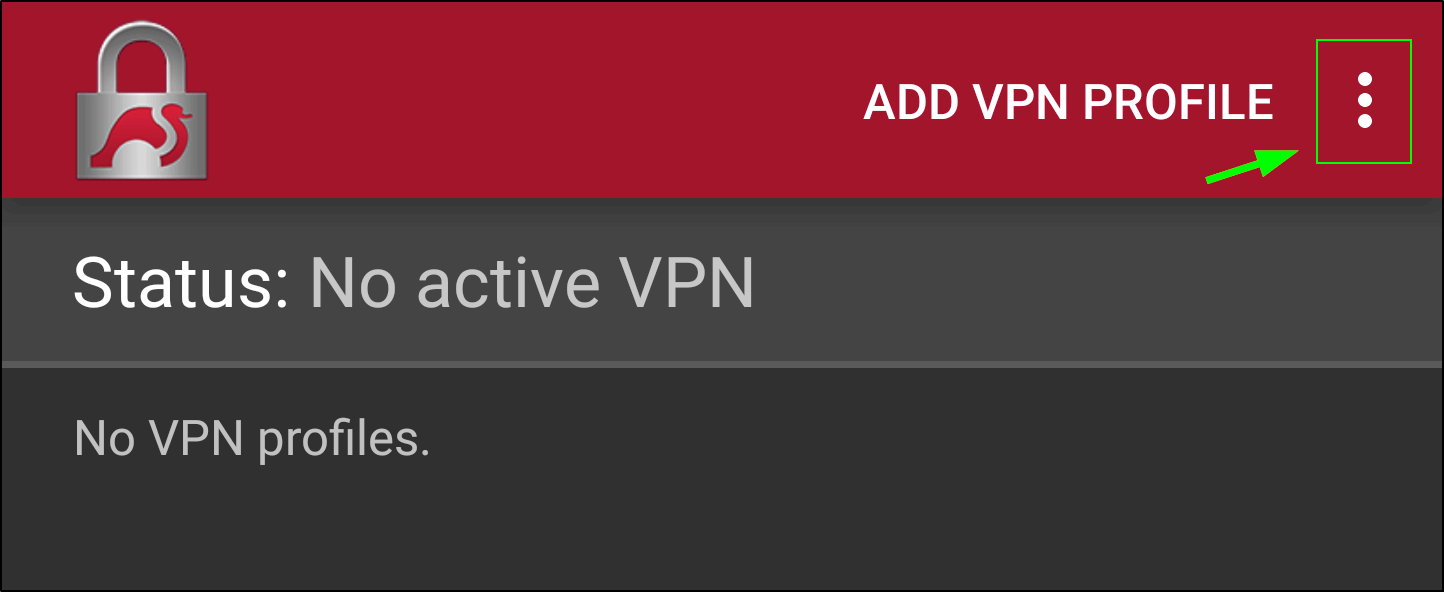
- With your remote, select the three vertical dots in the top right corner of the app.

-
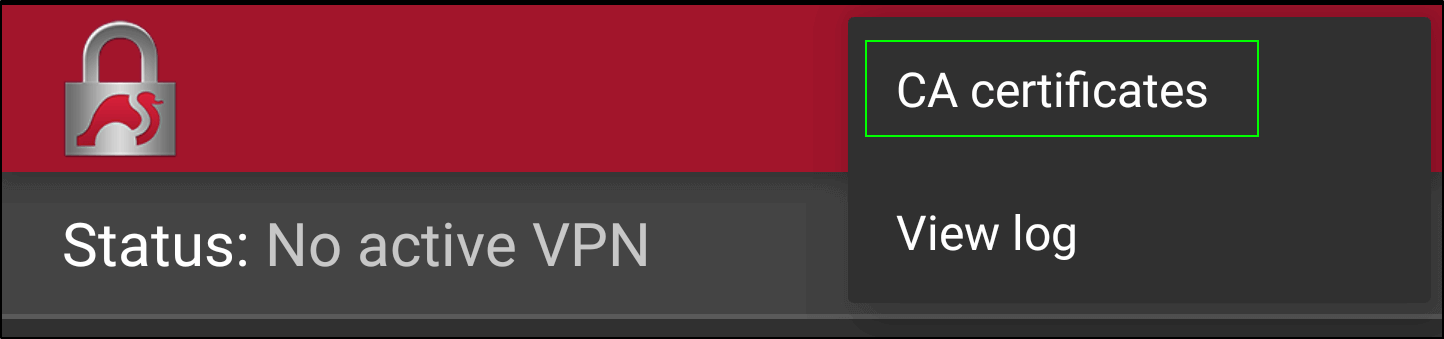
- Click on CA Certificates
-
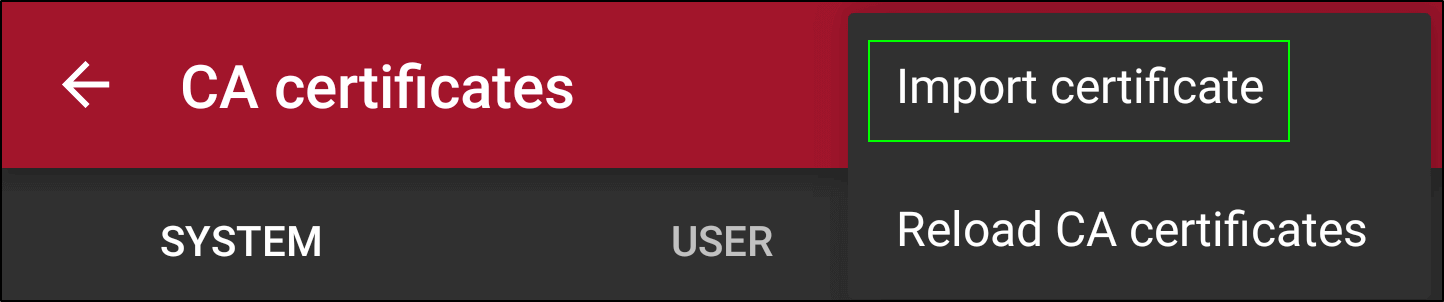
- In the next screen, select the three vertical dots again. Click "Import Certificate".
-
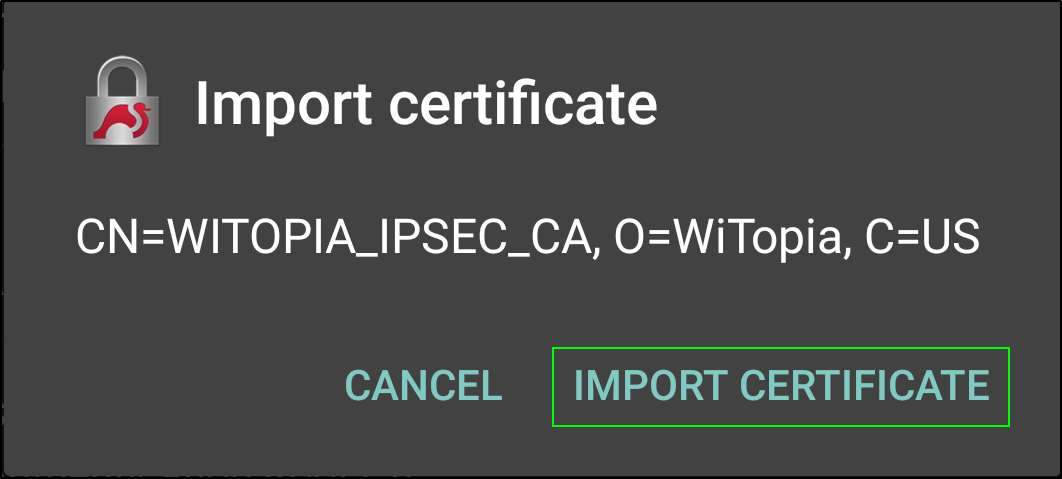
- Use the top left menu button to navigate your folders. Select Internal Storage > Then select the folder where you copied the ipsec_ca.crt file > Select the ipsec_ca.crt file.
- When you are prompted to "Import Certificate", Click to "Import Certificate".
- You should get the message "Certificate successfully imported" at the bottom of your screen.
-
- Press the back button on your controller until you reach the page with "add VPN profile" in the top right. Click there.
-
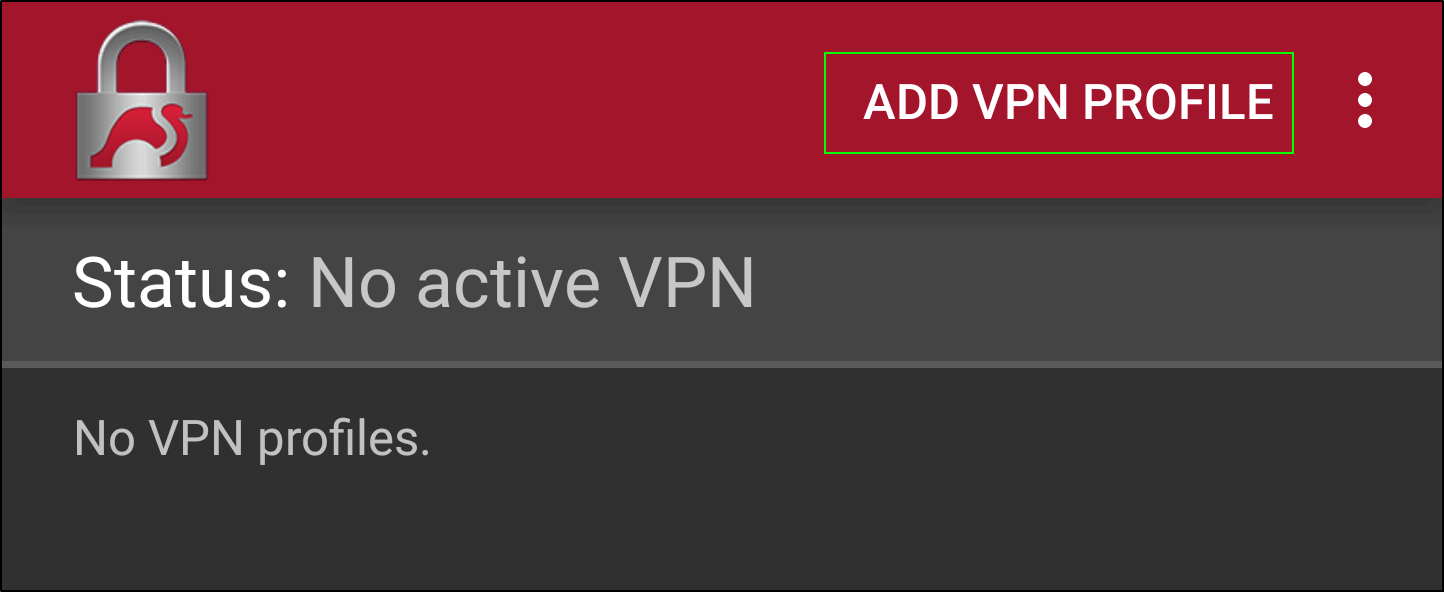
- Enter the following details into the configuration:
-
- Server Name: Choose a location from the following list
IPSec Server Location Addresses
USA IPSec VPN Gateways
ipsec.atlanta.witopia.net
ipsec.baltimore.witopia.net
ipsec.boston.witopia.net
ipsec.chicago.witopia.net
ipsec.dallas.witopia.net
ipsec.denver.witopia.net
ipsec.kansascity.witopia.net
ipsec.losangeles.witopia.net
ipsec.lasvegas.witopia.net
ipsec.miami.witopia.net
ipsec.newark.witopia.net
ipsec.newyork.witopia.net
ipsec.phoenix.witopia.net
ipsec.portland.witopia.neta
ipsec.redding.witopia.net
ipsec.sanfrancisco.witopia.net
ipsec.seattle.witopia.net
ipsec.washingtondc.witopia.netCanada IPSec VPN Gateways
ipsec.montreal.witopia.net
ipsec.toronto.witopia.net
ipsec.vancouver.witopia.netCentral/South America IPSec VPN Gateways
ipsec.mexicocity.witopia.net
Europe IPSec VPN Gateways
ipsec.amsterdam.witopia.net
ipsec.barcelona.witopia.net
ipsec.berlin.witopia.net
ipsec.brussels.witopia.net
ipsec.bucharest.witopia.net
ipsec.budapest.witopia.net
ipsec.copenhagen.witopia.net
ipsec.dublin.witopia.net
ipsec.frankfurt.witopia.net
ipsec.helsinki.witopia.net
ipsec.lisbon.witopia.net
ipsec.london.witopia.net
ipsec.luxembourg.witopia.net
ipsec.madrid.witopia.net
ipsec.milan.witopia.net
ipsec.moscow.witopia.net
ipsec.mumbai.witopia.net
ipsec.oslo.witopia.net
ipsec.paris.witopia.net
ipsec.prague.witopia.net
ipsec.riga.witopia.net
ipsec.reykjavik.witopia.net
ipsec.stockholm.witopia.net
ipsec.vilnius.witopia.net
ipsec.warsaw.witopia.net
ipsec.zurich.witopia.netAfrica/Middle East IPSec VPN Gateways
ipsec.jerusalem.witopia.net
ipsec.johannesburg.witopia.netAsia IPSec VPN Gateways
ipsec.bangkok.witopia.net
ipsec.hongkong.witopia.net
ipsec.kualalumpur.witopia.net
ipsec.newdelhi.witopia.net
ipsec.singapore.witopia.net
ipsec.seoul.witopia.net
ipsec.tokyo.witopia.netOceania IPSec VPN Gateways
ipsec.auckland.witopia.net
ipsec.melbourne.witopia.net
ipsec.sydney.witopia.netPowered by HTML5 Responsive FAQ -
- VPN Type: IKEv2 EAP (Username/Password)
- Username: [Your VPN username]
There are two potential formats for your vpn username. You must use the one you selected when you activated your service. If you do not remember, you can log in to your account on our website here here and under your active service it says “USERNAME”. This is your VPN username.
#1: Your email = W\your@email.com
#2: WiTopia username = username@witopiaYou MUST use a Capital W with a backslash “\” if your vpn username is an email.
If you have a username ending in “@witopia” then you do *not* use W\ before the username or “.net” after the username- Password: [Your VPN password]
- CA Certificate: Leave this as "select automatically"
- DO NOT check "show advanced settings"
- Click "save" in the top right corner
-
You are now setup and ready to connect.
Connecting and Disconnecting
From the main StrongSwan screen, select the configuration you just created, and click the Enter button on your controller to connect.
You should get a "Connected" status. And you're done!
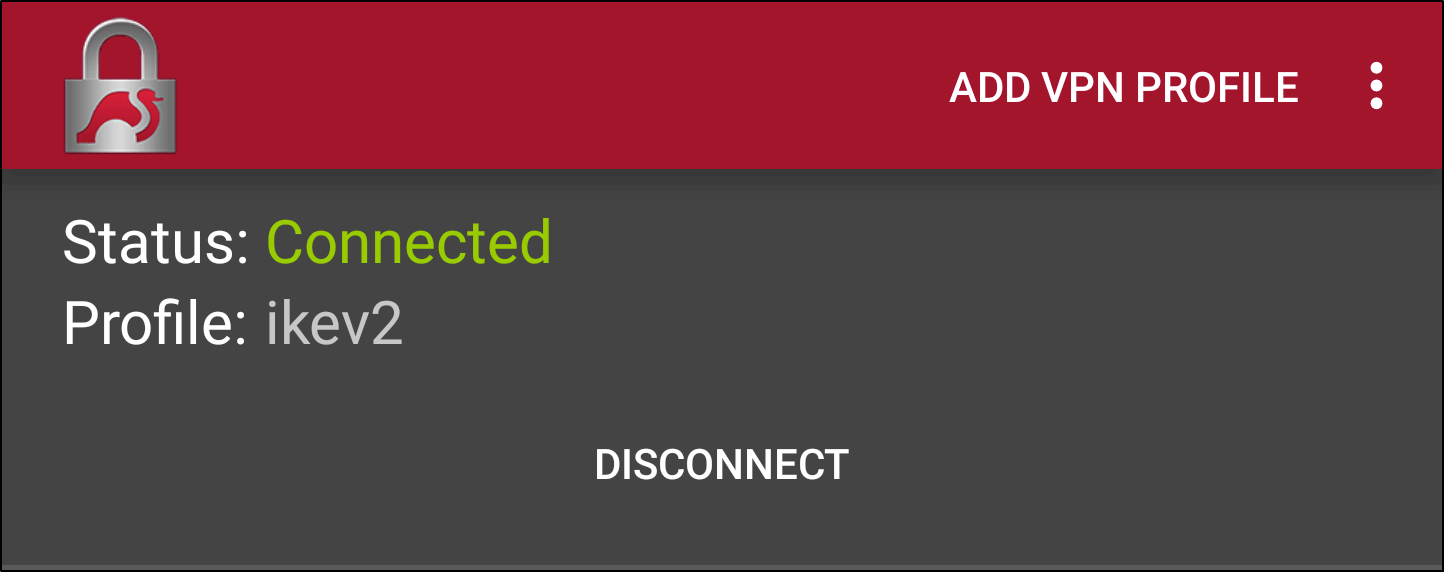
To Disconnect, select "Disconnect" on that same screen.
You may add more profiles with different VPN gateways as you wish.
**Tip! To edit or delete a configuration that you have already saved: Select the config you wish, and HOLD DOWN the main Enter button on your remote. You will get an "edit" and "delete" option in the top right of your screen.